
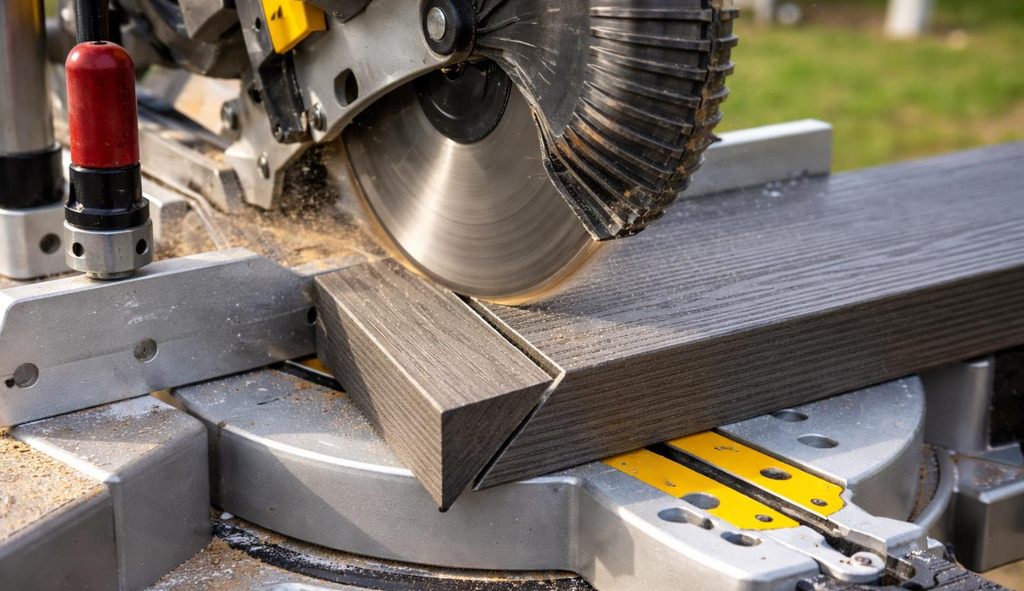
Building a beautiful and durable deck requires careful planning and execution, especially when working with composite decking. This guide will walk you through the essential steps to achieve professional-looking corners and a flawless finish for your composite deck. For more of our guides about composite decking methods, check out our general guide on cutting composite decking and also, check out how to get the mitre corners right.
Understanding Composite Decking
To successfully work with composite decking, it’s crucial to first understand its fundamental characteristics. This section will delve into what composite decking is, its various benefits, and the different types of composite deck boards available on the market, setting the stage for a smooth and effective installation process for your new deck.
What is Composite Decking?
Composite decking is an innovative building material, typically made from a blend of recycled plastic and wood fibers. This unique composition gives composite boards superior properties compared to traditional timber, making it a popular choice for deck construction. Understanding this material is the first crucial tip for anyone looking to install a new composite deck with a professional finish.
Benefits of Composite Decking
The advantages of composite decking are numerous, ranging from enhanced durability to minimal maintenance requirements. Unlike traditional timber, composite materials resist rotting, warping, and insect infestations, ensuring your deck maintains its pristine appearance for years to come. This resilience makes composite an excellent choice for a long-lasting and aesthetically pleasing outdoor living space.
Types of Composite Deck Boards
Composite deck boards come in a variety of styles, colors, and finishes, catering to diverse aesthetic preferences and functional needs. Options include solid, hollow, and capped boards, each offering unique benefits in terms of strength, weight, and resistance to scratches and fading. Selecting the right type of board is crucial for achieving the desired look and longevity of your new deck.
Preparing for the Cut
Tools Needed for Cutting Composite Decking
To accurately cut composite decking, selecting the right tools is paramount for a professional finish. A quality circular saw or miter saw is indispensable for making precise and clean cuts, especially when dealing with the density of composite materials. For intricate cuts, such as those required for deck boards around obstacles or for creating specific edge details, a jigsaw can also be a valuable addition to your toolkit.
Measuring and Marking the Deck Boards
Accurate measuring and marking are crucial steps before you cut composite decking, ensuring that each board fits perfectly into your deck frame. Use a reliable tape measure and a carpenter’s square to mark your cut lines, ensuring they are perpendicular to the edge of the board. This precision will minimize waste and contribute significantly to the overall aesthetic of your new composite deck, especially when installing the fascia board or border boards.
Safety Tips for Cutting Composite Decking
Safety should always be a top priority when you cut composite decking. Always wear appropriate personal protective equipment, including safety glasses and hearing protection, to shield yourself from flying debris and the noise of the saw. Ensure your work area is clear of obstructions and that your deck boards are securely clamped before making any cuts to prevent slippage and potential injury, especially when using a circular saw or table saw.
Cutting Corner Sections
How to Cut Composite Decking Corners
Cutting precise corners on your composite deck is essential for a clean and professional finish, particularly for a picture frame border. The most common method involves using a miter saw to achieve accurate miter joints at a 45-degree angle. This technique allows two composite deck boards to meet perfectly at a 90-degree corner, creating a seamless transition that significantly enhances the aesthetic of your deck surface. For difficult cuts, a circular saw can be used with a guide to ensure straight lines.
Tips for a Clean Edge Finish
Achieving a clean edge finish when you cut composite decking is key to a professional-looking new composite deck. Always use a sharp, fine-tooth blade specifically designed for composite materials or wood to prevent splintering and rough edges on your deck boards. After making the cut, inspect the cut ends for any small burrs or imperfections. A quick pass with sandpaper or a light file can polish the edge, reducing the visibility of the cut and ensuring a smooth, finished look that minimizes debris accumulation.
Common Mistakes to Avoid
When cutting composite decking, several common mistakes can compromise the finish and structural integrity of your deck. One frequent error is not accounting for expansion and contraction of the composite materials due to temperature changes, leading to gaps or buckling. Another mistake is using a dull saw blade, which can result in rough, uneven cut ends and damage the board. Forgetting to adequately support the deck boards during cutting can also lead to inaccurate cuts and potential injury, so ensure your frame or a stable workbench provides proper support.
Finishing Touches on Your Composite Deck
Installing the Fascia Board
Installing the fascia board is a critical step in achieving a polished and complete finish for your new composite deck, effectively hiding the exposed deck frame and joists. This trim piece provides a clean, finished edge to the entire structure, giving your composite deck a professional appearance. When you install the fascia board, ensure it is properly aligned and securely fastened to the rim joist, often using screws or a hidden fastening system, to prevent any gaps or movement. This final touch significantly elevates the aesthetic appeal of your composite deck, especially when combined with precisely cut composite decking boards.
Creating a Picture Frame Design
Creating a picture frame design around the perimeter of your composite deck significantly enhances its visual appeal, providing a distinct border that highlights the main deck surface. This involves installing border boards with meticulous miter joints at the corners, which requires precise cuts using a miter saw. This technique not only adds a sophisticated finish but also helps to define the edges of your deck. Careful planning and accurate measurements are essential to achieve a seamless and elegant picture frame effect, ensuring each deck board fits perfectly to form a continuous and attractive edge.
Final Edge Finishing Tips
For a truly professional finish on your composite deck, paying attention to the final edge details is paramount. After all deck boards are installed, inspect all cut ends for any rough edges or burrs that may have resulted from cutting composite decking. A light sanding with fine-grit sandpaper can effectively polish these edges, reducing any imperfections and providing a smooth, clean feel. This final touch minimizes the accumulation of debris and moisture, contributing to the longevity and aesthetic appeal of your new composite deck, ensuring a flawless and refined look.
Conclusion and Pro Tips
Summary of Key Steps
To recap, achieving a professional finish on your composite deck involves several key steps, starting with understanding composite materials and selecting the right tools, such as a circular saw or miter saw, for precise cuts. Accurate measuring and marking are crucial before you cut composite decking, especially for creating clean miter joints and a picture frame design. Proper installation of fascia board and meticulous edge finishing are vital for a complete look. Always prioritize safety and account for expansion and contraction of composite decking boards to ensure the durability and aesthetic integrity of your new composite deck.
Expert Tips for a Professional Finish
For a truly professional finish on your DIY composite deck project, consider a few expert tips. Always use a fine-tooth blade specifically designed for composite decking to prevent splintering and ensure clean cut ends, especially when making difficult cuts. When installing the deck boards, maintain consistent spacing between them to allow for proper expansion and contraction, which is crucial for the longevity of your composite deck. For a truly seamless edge, ensure all trim pieces, like the fascia board, are perfectly aligned and securely fastened, creating a polished and finished look that homeowners will appreciate for years.
Resources for Further Learning
For those looking to deepen their knowledge and further refine their composite decking installation skills, numerous resources are available. Online tutorials from manufacturers like Trex often provide detailed guides and videos on how to cut composite decking and achieve specific designs. DIY forums and professional decking websites offer a wealth of tips and advice from experienced builders, covering everything from proper joist spacing to advanced miter techniques for your picture frame. Consulting these resources can help you tackle any challenge, ensuring your new composite deck project is a resounding success, offering a professional finish and lasting enjoyment.
FAQ
How do I cut board ends cleanly for inside corners when coping composite decking?
To cut board ends neat for inside corners first mark the top edge and groove location, then use a fine-tooth saw or jigsaw with a carbide blade to rip the composite. Coping the board into the groove gives a flush fit; remove the small amount at the top edge so the profiled edge nests against the edge boards. A test cut on a scrap will help maintain a neat coping line and prevent tear-out.
Can I rip composite boards to the correct width and still keep the colour consistent at cut board ends?
Yes, you can rip composite to width but be aware the exposed cut board ends may reveal a slightly different inner colour or texture. Use a sharp carbide blade and light sand the end for a consistent appearance. Some installers seal or use colour-matched PVC or edge trim to hide the cut board ends for a cleaner finish.
What’s the best way to fix inside and outside corners so boards expand and contract without gaps at cut board ends?
Leave the manufacturer’s recommended expansion gap at each fixed point and use hidden fasteners or slotted screw holes so boards can move. At cut board ends in corners fasten the board to blocking or a rim joist, and avoid nailing through the profile where boards expand and contract. A small gap covered by an edge board or trim allows movement while keeping a neat appearance.
Should I use PVC trim or composite edge boards when finishing cut board ends at outside corners?
PVC trim provides a uniform colour and resists moisture at cut board ends, while matching composite edge boards give a consistent look and similar expansion characteristics. Many installers prefer composite edge boards where possible for movement compatibility, and reserve PVC for a neat, durable top edge or where a crisp flush profile is desired.
How do I make a flush outside corner joint when two boards meet at different widths or groove positions?
Measure and rip each board to the correct width so the grooves and top edge align; use a coping or scribe cut to fit the profile flush. If grooves don’t align, create a small filler strip that nests in the groove or use an L-profile edge board. Secure joints with hidden fasteners or appropriate nails driven into blocking so the visible surface remains flush and neat.
What nail or fastener should I use to prevent splitting at cut board ends and still allow movement?
Use manufacturer-approved hidden clip systems or stainless steel screws in slotted holes rather than standard nails at cut board ends. If face nailing is unavoidable, use corrosion-resistant screws and pre-drill slightly oversized holes to allow boards expand and contract. Avoid rigid fixings close to the end of a board to prevent splitting.
How do grooves and profiles affect cutting for inside/outside corners and overall fit of cut board ends?
Grooves determine how boards interlock and where hidden fasteners sit, so align groove positions when planning corner cuts. For inside corners you may need to remove part of the groove to create a clean coping joint; for outside corners use the groove to accept a corner trim or edge board. Understanding the profile ensures a tight, neat fit at cut board ends without impeding expansion.
Are there woodworking tips installers use to get a professional look on cut board ends at corners?
Yes — mark accurately, clamp boards when ripping to prevent chipping, use fine-tooth carbide blades, and sand the cut board ends lightly. Test-fit pieces, use corner blocks or blocking behind the joint, and finish with matching fillers or colour-matched trim for a neat result. Experienced installers also plan for boards expand and contract by spacing and fixing strategically.
Recent Posts
A comprehensive guide to achieving flawless miter joints when working with composite decking. This article delves into the intricacies of miter cuts, essential tools, and expert techniques to ensure...
Australia boasts some of the world's most remarkable hardwood timber species, with strength properties that rival or exceed international alternatives. From the legendary hardness of Ironbark to the...