
Transforming worn, scratched hardwood floors into beautiful surfaces doesn’t always require complete replacement. Learning how to refinish hardwood floors can save you money while adding significant value to your home. This comprehensive guide walks you through the process of hardwood floor refinishing and resurfacing, giving you all the information needed to achieve fabulous floors that look brand new, whether you choose to tackle it as a DIY project or hire a professional resurfacing service.
What is the difference between refinishing and resurfacing hardwood floors? Understanding wood floor restoration terminology
When exploring options to rejuvenate your flooring, you’ll encounter terms like refinishing and resurfacing that may seem interchangeable but actually describe different processes. Hardwood floor refinishing typically involves sanding down the existing finish and applying new stain and polyurethane to the wood floor. This process removes the top layer of the wood, eliminating scratches, wear and tear, and old finishes. Hardwood floor resurfacing, on the other hand, is a less invasive process that addresses the floor finish without significantly sanding down the wood itself. Resurfacing may include screening (light sanding) and applying a new topcoat of polyurethane to refresh the appearance of the floor without removing as much material. Understanding the difference between refinishing and resurfacing is crucial for determining which approach is appropriate for the condition of your floor.
When to choose refinishing vs. resurfacing
The decision between refinishing and resurfacing your hardwood floors depends largely on the extent of damage and the floor’s current condition. Full refinishing is ideal when your hardwood floors show significant scratches, deep wear patterns, or water damage across the floor. If the color of the wood is faded unevenly or you wish to change the stain color entirely, refinishing is necessary. This more intensive process allows you to completely transform the appearance of your floors. Resurfacing may be sufficient if your hardwood floors without deep damage simply look dull or have minor surface scratches. This less invasive approach works well when the floor finish has worn thin but the underlying wood remains in good condition. Resurfacing typically takes less time, creates less dust, and costs less than a complete refinishing job, making it an attractive option for floors that need refreshing rather than restoration.
Key benefits of each approach for your hardwood
Refinishing your hardwood floors offers several significant advantages, including the ability to completely change the color and appearance of the wood floor, removal of deep scratches and stains, and extension of your floor’s lifespan by decades. When you refinish your hardwood floors completely, you’re essentially giving them a fresh start, which can dramatically increase value to your home. The primary benefit of wood floor refinishing is the ability to address problems that have penetrated beyond the surface finish. Alternatively, hardwood floor resurfacing provides a quicker, less disruptive solution that still improves the appearance of your flooring. Benefits of resurfacing include lower cost, less mess and disruption to your household, and the ability to complete the project in a shorter timeframe. Resurfacing may be repeated more frequently than full refinishing, allowing you to maintain fabulous floors with minimal downtime. Both approaches help protect your solid hardwood investment, but choosing the right one depends on your specific needs, budget, and the current condition of your floor.
How much does it cost to refinish hardwood floors? Factors affecting hardwood floor refinishing costs
The cost to refinish hardwood floors varies significantly based on several key factors. Square footage is perhaps the most obvious determinant, as larger areas require more materials and labor to refinish your floors. The condition of your floor plays a crucial role as well; floors with extensive damage, deep scratches, or significant wear and tear will require more intensive preparation work, potentially increasing costs. The type of wood is another important factor, as some exotic hardwoods or sensitive species require specialized techniques and finishes. Regional labor costs can cause prices to fluctuate by as much as 50% from one area to another. Additionally, the complexity of the job impacts pricing – rooms with many corners, closets, or built-in features require more detailed work when you refinish your hardwood floors. If furniture removal and replacement is needed, this service may add to the overall cost. Most hardwood refinishing professionals charge between $3-$8 per square foot, with the national average falling around $4.50 for a standard solid hardwood floor refinishing project.
DIY vs. professional resurfacing service pricing
When contemplating whether to refinish your hardwood floors yourself or hire professionals, cost considerations often play a decisive role. A DIY project to refinish your floors can be significantly less expensive, with potential savings of 50-70% compared to hiring professionals. For a typical 500 square foot space, DIY refinishing might cost $500-$1,000 in materials and equipment rental, while professional hardwood floor refinishing for the same area could range from $2,000-$4,000. However, the equation isn’t quite so simple. DIY floor refinishing requires renting or purchasing a floor sander and other specialized equipment, buying materials like sandpaper, wood stain, polyurethane, and safety gear, and investing considerable time. Professional resurfacing services bring expertise that helps avoid costly mistakes like uneven sanding or improper application of stain across the floor. They also typically warranty their work and can complete the job more quickly. Many homeowners find that while the upfront cost of hiring professionals is higher, the quality results, time savings, and reduced risk of expensive errors make professional hardwood resurfacing a worthwhile investment for this skill-intensive project.
Budgeting for different types of hardwood flooring restoration
Different restoration approaches come with varying price points, and understanding these differences helps in setting realistic budget expectations. Basic hardwood floor resurfacing, which involves light sanding and applying a new coat of polyurethane, typically costs between $1-$3 per square foot when professionally done. This is the most economical option for floors without significant damage. Standard hardwood floor refinishing, including sanding the floor completely, staining if desired, and applying multiple coats of finish, ranges from $3-$5 per square foot professionally. For more complex projects, such as refinishing an entire floor with significant damage repair, inlay work, or custom staining, costs can climb to $6-$10 per square foot. Engineered hardwood presents special considerations; depending on the thickness of the wood veneer, professional refinishing may cost more due to the care required to avoid sanding through the thin top layer. When budgeting, also factor in potential additional expenses such as baseboard removal and reinstallation, furniture moving, and accommodation costs if you need to vacate during the process. Creating a comprehensive budget that accounts for these variables will help ensure your wood floor refinishing project proceeds without financial surprises.
What tools and materials do I need to refinish my hardwood floors? Essential floor sander options and rental information
The floor sander is undoubtedly the most critical piece of equipment when you decide to refinish your hardwood floors. Three main types of sanders are typically used in the process. The drum sander is the workhorse of hardwood refinishing, removing old finish and leveling the floor quickly. These powerful machines are available at most rental centers for approximately $50-80 per day. An edge sander is essential for reaching areas close to walls where the drum sander cannot reach, typically renting for $30-50 daily. The buffer or orbital sander provides the final smooth finish before applying new stain and polyurethane, available for about $30-40 per day. When renting equipment to refinish your floors, most centers offer package deals if you rent all three sanders together. Be sure to inquire about sandpaper requirements – you’ll need various grits ranging from coarse (36-40 grit) for initial sanding to fine (100-120 grit) for finish sanding. Most DIYers find that a weekend rental is sufficient for an average-sized room, though larger projects may require longer rental periods. Always ask the rental center for a demonstration of proper use to avoid damaging your wood floor with improper sanding techniques. Additionally, consider renting a shop vacuum designed for sawdust collection to manage the substantial dust created when you sand the floor.
Choosing the right wood stain and polyurethane finish
Selecting the appropriate wood stain and finish is crucial for achieving the desired appearance and durability when you refinish your hardwood floors. For staining, consider both oil-based and water-based wood stain options. Oil-based stains penetrate deeper into the wood, highlighting the grain pattern and providing rich color, but they require longer drying times (often 24-48 hours). Water-based stains dry faster (2-3 hours) and emit fewer VOCs, making them more environmentally friendly, though they may not penetrate as deeply. The color of the wood stain should complement your home’s interior design while considering the natural characteristics of your hardwood species. For the protective topcoat, polyurethane finishes come in several formulations. Oil-based polyurethane offers exceptional durability and a warm amber glow that deepens over time, making it popular for traditional homes. Water-based polyurethane dries clear and maintains the natural color of the wood, making it ideal for light-colored or contemporary floors. It also dries faster and has lower odor. Regardless of which type you choose, select the appropriate sheen – high-gloss finishes show scratches more readily but are easiest to clean, while satin or matte finishes hide wear and tear better but may require more frequent refinishing. For high-traffic areas, consider adding a hardener to your polyurethane for additional durability across the floor.
Safety equipment for floor refinishing projects
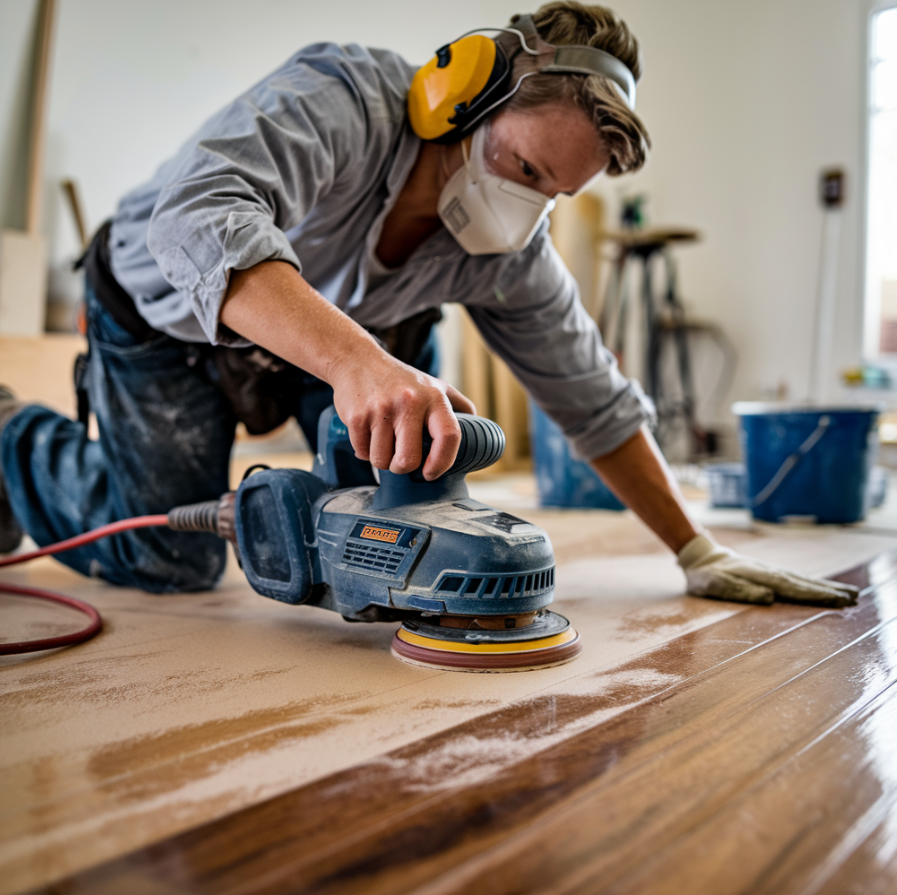
Hardwood floor refinishing involves potential hazards that require proper safety equipment. Respiratory protection is paramount when you refinish your hardwood floors due to the significant amount of fine wood dust generated during sanding. A NIOSH-approved respirator mask rated for dust particles is essential – don’t rely on simple dust masks. Eye protection in the form of safety goggles is crucial to prevent dust and splashes from stains or polyurethane from entering your eyes. Ear protection becomes necessary due to the loud noise produced by the floor sander, which can reach harmful decibel levels during extended use. Knee pads are beneficial when applying stain or finish across the floor, protecting your knees during hours of work at floor level. Clothing considerations include wearing long sleeves and pants to protect your skin from dust and chemicals. Footwear should be clean, non-marking, and free of debris to avoid scratching the floor during the refinishing process. When using chemical products like stains, finishes, or cleaners, chemical-resistant gloves help protect your hands from irritation and absorption of potentially harmful substances. Additionally, proper ventilation is critical throughout the refinishing process – use fans and open windows to ensure adequate air circulation, particularly when applying polyurethane finishes which emit strong fumes. Taking these safety precautions seriously will help ensure your DIY project to refinish your floors proceeds without health complications.
What’s the step-by-step process to sand and refinish hardwood floors? How to prepare and clean the floor before sanding
Proper preparation is crucial for successful hardwood floor refinishing. Begin by removing all furniture, area rugs, and décor from the room. Carefully examine the entire floor for protruding nails or staples that could damage the sander; either sink them below the wood surface or remove them completely. If your baseboards will remain in place, protect them with painter’s tape. For floors with significant grime or old wax buildup, you’ll need to thoroughly clean the floor before any sanding can begin. Use a hardwood floor cleaner specifically designed to remove wax and buildup, applying it according to the manufacturer’s instructions. For stubborn residue, a mixture of white vinegar and warm water can help break down old finishes. After cleaning, allow the floor to dry completely—typically 24 hours—as moisture trapped in the wood can cause problems when you refinish your hardwood floors. Check for loose boards and secure them with finish nails. For deeper scratches or gouges that may require filling, make note of their locations for special attention during the sanding process. Finally, seal off the work area from other parts of your home using plastic sheeting and tape to minimize dust migration, and cover vents to prevent dust from entering your HVAC system. These preparation steps help ensure the sanding process will be effective and produce optimal results when you refinish your floors.
Proper techniques to sand the floor without damage
Sanding is perhaps the most critical and technically demanding aspect of hardwood floor refinishing. To begin, you’ll want to sand the floor using a drum sander, working diagonally across the grain for the first pass with coarse-grit sandpaper (typically 36-40 grit). This approach helps level the floor and remove deep scratches more effectively. Always keep the sander moving when it’s powered on to prevent gouging, and overlap each pass by about 50% to ensure even sanding. After the initial diagonal pass, switch to sanding in the direction of the wood grain, gradually progressing through medium (60-80) to fine (100-120) grit papers. The edge sander comes into play for areas the drum sander can’t reach—along walls, in corners, and around built-in features. Use the same grit progression with the edge sander as with the drum sander. For the final sanding, a buffer or orbital sander with fine-grit screens helps eliminate any remaining swirl marks or imperfections. Between each sanding phase, thoroughly vacuum the floor to remove all dust before proceeding to the next grit. This prevents coarser particles from causing new scratches. Hand sanding with a sanding block may be necessary in tight spaces or intricate areas. Remember that the goal is to create a smooth, even surface free of scratches, old finish, and imperfections. Most hardwood floor refinishing professionals recommend removing all dust again after the final sanding using a tack cloth or microfiber mop slightly dampened with mineral spirits, ensuring no particles remain to mar your new finish.
Applying stain and how to seal the floor properly
After sanding is complete and the floor is thoroughly clean, you’re ready to apply stain if desired, followed by a protective finish. Begin by testing your chosen wood stain on an inconspicuous area or on a sample piece of the same wood to confirm the color. When you’re satisfied with the color, apply the stain using a lamb’s wool applicator, foam pad, or brush, working in small sections and always in the direction of the wood grain. Apply stain evenly across the floor, being careful to avoid puddles or uneven application that could lead to blotchiness. Allow the stain to penetrate for the time recommended by the manufacturer (typically 5-15 minutes) before wiping off excess with clean, lint-free rags. For deeper color, you may apply a second coat after the first has completely dried. Once the stain has dried thoroughly (usually 24-48 hours), you’re ready to seal the floor with polyurethane. Begin by applying a thin coat of polyurethane using a high-quality brush or applicator, working in long, smooth strokes with the grain. Allow this first coat to dry completely according to manufacturer instructions (typically 24 hours), then lightly sand with fine-grit sandpaper (220 grit) to create a smooth surface for the next coat. Clean thoroughly after sanding to remove all dust. Apply at least two more coats of polyurethane using the same technique, sanding lightly between each coat. The final coat should be allowed to cure completely—often 72 hours or more—before returning furniture to the room or subjecting the floor to normal foot traffic. This methodical approach ensures your refinished hardwood floors will have beautiful color and a durable protective finish that will last for years.
How to fix common problems when refinishing hardwood floors? Dealing with scratches and wear and tear
When you refinish hardwood floors, addressing existing scratches and wear and tear requires different approaches depending on severity. For surface scratches that haven’t penetrated through the finish, you may not need to sand the floor completely. Instead, screen and recoat—a process that lightly abrades the existing finish and applies a new topcoat of polyurethane—can often restore the appearance. For deeper scratches that have affected the wood itself, full sanding is necessary during the hardwood floor refinishing process. Start with coarser sandpaper to remove enough material to eliminate the scratch entirely. Very deep gouges may require wood filler compatible with your floor type before sanding. Apply the filler, allow it to dry completely, then sand until flush with the surrounding wood. For floors with significant wear patterns in high-traffic areas, ensure you sand evenly across the floor to create a uniform surface. Areas with severe wear may require additional passes with the floor
FAQ
Q: What is hardwood floor resurfacing and when should I consider it?
A: Hardwood floor resurfacing is the process of sanding down the surface of your floors to remove the old finish, repairing any minor damages, and applying a new wood finish. You should consider resurfacing when your floors show signs of wear such as scratches, dullness, or minor discoloration, but are not heavily damaged. Typically, hardwood floors can be refinished multiple times throughout their lifetime. This process can add value to your home and extend the life of your floors by 10-15 years, making it a worthwhile investment when your floor needs rejuvenation.
Q: What’s the difference between resurfacing and refinishing hardwood floors?
A: While the terms are often used interchangeably, there is a subtle difference. Resurfacing and refinishing both involve sanding down the surface and applying a new finish, but resurfacing typically implies addressing more significant issues like repairing damaged boards or fixing structural problems. Refinishing focuses primarily on the cosmetic aspects – removing the old finish and applying a new one to change the floor color or restore its appearance. Both processes require sanding in most cases, though there are some products advertised for refinishing hardwood floors without sanding for minor wear situations.
Q: What tools and materials do I need for wood floor refinishing?
A: For proper wood floor refinishing, you’ll need: a drum sander and edge sander (usually rented), sandpaper in various grits (36-60 for initial sanding, 80-100 for middle sanding, and 120-150 for final sanding), a buffer with screening pads, wood filler for cracks or holes, tack cloths to remove dust, a quality wood finish (polyurethane, varnish, or oil), applicators (brushes, rollers, or lambswool applicators), and personal protective equipment for floor refinishing safety (respirator, eye protection, and ear protection). You can find most of these supplies at a home improvement store. Additionally, you’ll need plastic sheeting to protect other areas from dust and proper ventilation equipment.
Q: How much does it cost to resurface your wood floors?
A: The cost to resurface your wood floors typically ranges from $3 to $8 per square foot, depending on your location, the condition of your floors, and the type of flooring you have. DIY refinishing is cheaper, with material costs running about $1-$2 per square foot plus equipment rental fees (approximately $200-$300 for a weekend). Professional hardwood resurfacing will cost more but ensures quality results. Additional costs may include furniture moving, baseboards removal/replacement, and repairs for damaged boards. High-end wood finish options or specialty stains will also increase the price. It’s generally much cheaper to refinish existing hardwood than to install new hardwood floors, which can cost $8-$15 per square foot.
Q: How long does the floor finish take to dry when refinishing hardwood floors?
A: Drying times vary based on the floor finish type you choose. Water-based polyurethane typically dries to the touch in 2-4 hours, with light foot traffic possible after 24 hours, but requires 7-14 days for a complete cure. Oil-based polyurethane takes longer, usually 24 hours between coats and up to 30 days for a full cure. Natural oils like tung or linseed oil may require 24-48 hours between applications and 30 days to fully cure. Humidity, temperature, and ventilation significantly affect drying times. It’s important not to drag furniture across the floor or place area rugs until the finish has completely cured to avoid damaging your newly refinished surface.
Q: Can all types of hardwood floors be resurfaced?
A: Not all hardwood floors can be resurfaced. Solid hardwood floors can be refinished multiple times because they typically have 3/4 inch thickness. Engineered hardwood can sometimes be refinished, but it depends on the thickness of the top veneer layer – those with a wear layer of at least 2-3mm can usually be sanded at least once. Laminate flooring, which only mimics wood, cannot be resurfaced. Before beginning, you should also check the thickness of your existing floors; if they’ve been refinished multiple times already, they may be too thin for another sanding. For older homes with historic or rare wood species, consult a specialist as some popular hardwood varieties from decades ago may require special treatment or matching wood techniques that standard contractors might not be familiar with.
Q: What floor refinishing safety precautions should I take?
A: Floor refinishing safety requires several important precautions: Always wear a NIOSH-approved respirator mask when sanding or applying finishes, as wood dust and chemical fumes can be harmful. Use eye protection and ear protection when operating sanders. Ensure proper ventilation by opening windows and using fans to exhaust fumes. Turn off all pilot lights and ignition sources when using oil-based finishes, which are highly flammable. Properly dispose of oil-soaked rags which can spontaneously combust if left wadded up. Store and handle chemicals according to manufacturer guidelines. Disconnect electricity in the work area if possible to prevent sparks. Take breaks to avoid fatigue that could lead to accidents. Finally, keep children and pets away from the work area and freshly finished floors until completely cured.
Q: How can I make my floors look like the “fabulous floors” I see in magazines?
A: To achieve those “fabulous floors” magazine look, start with proper preparation: ensure thorough sanding to create a perfectly smooth surface. Consider hiring professionals for the best results. Choose high-quality stains and finishes – water-based polyurethanes offer clarity while oil-based gives amber warmth. Apply thin, even coats rather than thick ones, and sand lightly between coats using fine-grit sandpaper (220 grit). Wipe away all excess stain to prevent blotchiness. For contemporary looks, consider gray or whitewashed stains which are currently trending. Matte and satin finishes show fewer imperfections than high-gloss. Proper lighting can also enhance the appearance of your floors. Finally, develop a regular floor care routine with appropriate cleaners to maintain that magazine-worthy appearance for years to come.
Q: Is it better to hire professionals or DIY when resurfacing hardwood floors?
A: Whether to DIY or hire professionals depends on several factors. Professional hardwood resurfacing typically delivers superior results with proper equipment, expertise in using wood finishes correctly, and efficiency (completing in 3-5 days what might take a DIYer 1-2 weeks). Professionals can also better handle challenging situations like matching wood tones or dealing with difficult floor configurations. However, DIY is significantly cheaper (saving 50-70% on labor costs) and gives you complete control over the process. DIY is most suitable for experienced homeowners with moderate-sized, regularly-shaped rooms featuring floors in decent condition. If your floors are heavily damaged, contain exotic woods, have significant repairs needed, or you’re changing the wood type or pattern, professional services are recommended. Remember that mistakes in DIY refinishing can be costly to fix and might ultimately require professional intervention anyway.
Recent Posts
Building a beautiful and durable deck requires careful planning and execution, especially when working with composite decking. This guide will walk you through the essential steps to achieve...
A comprehensive guide to achieving flawless miter joints when working with composite decking. This article delves into the intricacies of miter cuts, essential tools, and expert techniques to ensure...